Wednesday, 7 August 2024

Posterior Pelvic Tilt

What is a Posterior Pelvic Tilt?

posterior pelvic tilt

A posterior rotation of the innominates is indicative of a posterior pelvic tilt. As a result, the person will typically appear to have a relatively flat back and "tucked under" buttocks. Even while the posterior tilt is less frequent than the anterior tilt, it still has many negative effects.

Because of the limited flexibility at the sacroiliac joints, the sacrum and lumbar spine move together with the pelvis when it moves. The vertebrae will stack more vertically on top of one another as a result of the posterior rotation, which will also lessen the lumbar lordosis. Reduction of compressive stresses in the spine and adequate shock absorption are two of the main purposes of lumbar lordosis.

Therefore, the spine's overall capacity to absorb shock is diminished when lumbar lordosis is lost. The intervertebral discs will experience greater compression stresses due to the vertebral bodies' more vertical placement on top of one another. Lumbar disc disease may be influenced by the intervertebral discs' increased degree of compression.

There are a number of causes of posterior pelvic rotations, but the majority result from long-term overuse of one's posture, such as slouching while sitting. If inadequate body mechanics, such as slouching, are repeatedly reinforced, it could worsen posterior pelvic rotation. Therefore, training good body mechanics and postural re-education are necessary in addition to short-term Physical therapies.

Causes of Posterior Pelvic Tilt

The posterior pelvic tilt may be caused by a number of muscle imbalance related causes. The pelvis may rotate posteriorly due to stiffness in the hamstrings and/or abdominal muscles. But because the hamstrings and abdominals are also phasic muscles, as they get tired, they lean toward weakening rather than hypertonicity.

Thus, this postural distortion cannot be caused by hamstring or abdominal tightness alone; rather, it requires a considerable degree of both. More often than not, posterior rotation is an adaptive habit continued by bad sitting and standing Body mechanics.

Posterior Pelvic Tilt Symptoms

Your lower back is under a lot of strain when you have a posterior pelvic tilt. Sciatica, or pain running down the back of one's thigh or glute, is one type of pain that might eventually result from this.

  • Weak and tight leg muscles
  • Shortened tendons around the pelvic bones
  • Feeling of tightness in abdominal muscles
  • Hamstring tightness
  • Improper balance
  • Poor posture
  • Reduced Lumbar Lordosis
  • Lower Back pain with or without Radiating pain in lower limb
  • Sciatica Pain
  • Hip Pain with or without Knee pain

A posterior pelvic tilt can be present by any of these variables. This is the moment when your upper body rounds back and your glutes tuck inward.

Long term Side Effects of Posterior Pelvic Tilt

Your entire posture is impacted because your neck and upper back are forced forward in an attempt to correct the improper pelvic position.

A forward head position and a more rounded shoulder, often known as thoracic kyphosis, are common symptoms of posterior pelvic tilt.

The compression strain on the mid and lower back will gradually rise due to posterior tilt. Due to the uneven loading of the spine caused by this increased compression stress, problems such as disk prolapse or disk herniation may result.

In addition, the lumbar curve's rounding places undue strain on your spine and raises the risk of hip, back, and leg pain.

Treatment of the Posterior Pelvic Tilt

The hamstring and abdominal muscle groups should be treated while treating posterior pelvic rotations. They require to get their tightness and myofascial trigger point presence looked upon. On the rectus abdominis muscle, longitudinal stripping and sweeping cross-fiber techniques can be used. It is possible to address the hamstring muscles' role in posterior pelvic tilting.

Treatment for the posterior pelvic tilt must include postural re-education, as was previously described. If soft tissue manipulation is tried without any kind of reinforced and corrected movement patterns, the practitioner is likely to have little success.

Stretches to Fix Pelvic Posterior Tilt:

Stretching Your Hamstrings While Seated

Long periods of sitting and standing can cause hamstring tightness, which can result in bad postures such a posterior pelvic tilt. Your hamstring will lengthen as a result of stretching, which will help your body maintain a more neutral pelvic position.

How to do it:

Sit down on a firm chair at first - Extend your left leg in front of you

Aim for three repetitions on each side. Bend forward and reach for your toes until you feel a minor stretch. 

Hold nearby for 10 to 20 seconds. Slowly return to the starting position. Repeat on your right side.

Take caution: If you extend the stretch too far, you risk pulling a muscle in your back. Take care not to go overboard. Try transferring this exercise on the floor if sitting in a chair is too challenging for you.

Bhujangasana: Abdominal Press Up (Cobra Pose)

Your tightened abdominal muscles will extend and become more flexible with the help of this stretch, which will enable a more neutral pelvic position.

How to carry it out:

- Start by lying on the floor with your hands flat at shoulder level. - Gradually push your hands up to lift your shoulder off the floor until you feel a slight stretch.

Exhale as you push deeper into the lumbar extension to increase your range of motion.  

Try to complete five repetitions.

Piriformis Stretch

The piriformis muscle may tighten up after extended periods of sitting. Stretching this muscle will enable the hip to move normally, which aids in achieving a neutral pelvic position.

How to do it:

Start by lying on your back with your feet flat on the ground and your knees bent.

To begin, place your right ankle over your left knee. Then, grab your left knee and draw it in towards your chest for a few seconds, until your right gluteal muscles stretch. Repeat on the other side. Try to complete three repetitions on each side.

Exercises to strengthen Muscles of the posterior pelvic tilt

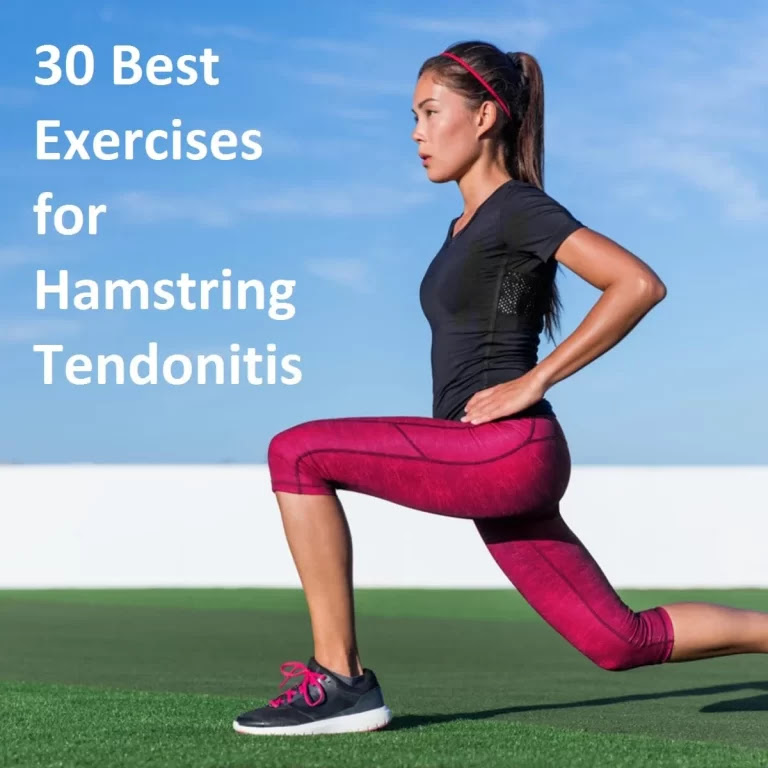
Lunges:

Lunges improve quadriceps strength. It may be possible to correct a posterior pelvic tilt by strengthening these muscles.

How to carry it out:

- Start by placing your feet together. Stretch out your left leg in front of you. When your left leg is bowed to a 90-degree angle, your right knee should come into contact with the floor. Resuming your initial position requires pushing up with your left leg. On your right side, repeat. Try to complete three sets of ten lunges on each side.

* When in the lunge position, make sure your knee does not go over your toe as this puts more strain on the knee.

Superman:

Superman assists with correcting improper pelvic alignment by strengthening your lower back and glutes, which are connected to your pelvis.

The exercise can be performed as follows:

Lay on your stomach on the floor with your arms extended in front of you
Slowly raise your chest off the ground and attempt to hold this posture for 30 seconds
Slowly return your body to the beginning position
Try to complete three repetitions.

Leg Lifts

Leg raises assist in strengthening your hip flexors, which become incredibly weak due to the pelvic posterior tilt.

How to carry it out:

- In Supine Position on the soft mat with your legs extended. Keeping your arms straight by your sides, slowly raise your legs off the ground by contracting your abdominal muscles.

– Return your legs to the beginning position slowly.

The secret to this exercise is to solely move your legs; this will help your core muscles grow.

This is a challenging workout; if you have trouble lifting your legs, consider bending your knees a little.

Adjustments to Sleeping

To help you sleep with appropriate posture:

  • Stay away of sleeping on your stomach.
  • Place a little pillow below your knees if you prefer to sleep on your back.
  • A pillow should be placed between your knees if you are a side sleeper.
  • Put a tiny pillow or rolled towel beneath your back's arch if you sleep on your back.
  • Verify that the cushion and mattress suit the natural curve of your spine.

Correcting Posterior Pelvic Tilt While Sitting

Whether you sit all day at work or just a lot of it, it's important to make sure that:

  • You are sat in a posture-supporting chair.
  • Your choice of workstation or table should enable you to sit upright and prevent slouching.
  • You can either utilise an integrated lumbar support chair or use a pillow for this type of assistance.
  • You make the effort to move around and stretch, especially if you spend a lot of time seated.
Issues related to posterior pelvic tilt:

A posterior pelvic tilt puts more pressure on the lower back bones. This pressure can result in fatigue of the muscles as well as tension in the neck muscles.
  • Soreness in the lower back.
  • Rotation inward at the hip and knee.
  • Knee ache and hip pain.
  • Hip flexor tension is the cause of sciatica.

Summary

The tilting of the pelvis backward is called a posterior pelvic tilt. It mostly results from an imbalance in the muscles of the legs and the core, which has an impact on your body, activities, everyday posture, and work habits.

The symptoms can range in intensity and include low back pain, stiffness in the hamstring and abdominal muscles, and slouched posture, among others. Exercises that stretch and strengthen tense and weak muscles are the mainstay of treatment, along with changes to sitting and sleeping positions and other bad work habits.

Monday, 29 July 2024

Anterior Pelvic Tilt

What is Anterior pelvic tilt?

Anterior Pelvic Tilt

Anterior pelvic tilt is a postural issue where your pelvis tilts forward, causing an increased curve in your lower back. It's a common problem often linked to a sedentary lifestyle, particularly excessive sitting.

Running, walking, and picking up objects off the ground are all made easier by your pelvis. It also aids in keeping proper posture.

Long durations of sitting, bad posture, weak core muscles, tight hamstrings and hips, muscular imbalances, and even hereditary predispositions can all contribute to this.

Stretching frequently and doing core-focused strengthening exercises like Pilates or yoga can help treat APT. See a physical therapist for help with posture correction if you don't think you have the skills or knowledge to handle this on your own.

Causes of Anterior Pelvic Tilt

Hip flexor tightness is mainly the cause of the anterior pelvic tilt. When walking or running, these muscles in the front of the hip assist in raising the leg. Tight Hip flexor can pull on the pelvis and cause it to tilt forward. Additional reasons for anterior pelvic tilt consist of:

  • Weak abdominal muscles
  • Weak gluteal (buttock) muscles
  • Hip flexor tightness
  • Poor posture
  • Congenital

Abdominal Muscle Weakness

The pelvis may tilt forward as a result of weak abdominal muscles because they cannot sustain the weight of the body properly.

Weak gluteal muscles (buttocks)

A forward tilt of the pelvis can also result from weak gluteal (buttock) muscles. These muscles support and maintain the pelvis' neutral posture.

Poor Posture

Anterior pelvic tilt is also frequently caused by poor posture. This covers postures like hunching over or rounding the shoulders. Muscle imbalances caused by poor posture can pull on the pelvis, causing it to tilt forward.

Congenital

Rarely APT Present from birth as a Congenital deformity.

Symptoms of Anterior Pelvic Tilt

There are several symptoms. Among the most common are:

  • Hip flexor tightness
  • Abdominal muscle weakness
  • Poor posture
  • Lower back pain
  • Sciatica Pain
  • Herniated discs

Hip flexor tightness

The most typical sign of anterior pelvic tilt is this. When walking or running, the front of the hip's hip flexor muscles assist in raising the leg. Tight Hip flexor can pull on the pelvis and cause it to tilt forward.

Weak muscles in the abdomen

Weak abdominal muscles are another sign of anterior pelvic tilt. This may result in a forward leaning trunk, further tilting the pelvis.

Poor posture

Another sign of APT is poor posture. This is because a rounded back can result from the trunk leaning forward due to a tilted pelvis.

Lower back pain

Lower back pain is also caused by APT. This is as a result of the pelvic tilt placing additional strain on the lower back.

Sciatica

Sciatica is the term for the condition caused by the sciatic nerve, which travels from the lower back down the leg, being compressed by a tilting pelvis.

Herniated disc

An further consequence of anterior pelvic tilt is herniated discs. This APT leads to the possibility of disc herniation caused by the increased strain on the lower back area.

Risk Factor

There exist multiple risk variables that may increase the likelihood of anterior pelvic tilt development. Among them are:

  • Having a sedentary lifestyle
  • Being obese(overweight)
  • Having tight hip flexor muscles
  • Having weak abdominal
  • Weak gluteal muscles
  • Poor posture
Anterior Pelvic Tilt vs Posterior Pelvic Tilt

Similar to anterior pelvic tilt, posterior pelvic tilt involves a rotation or tilt of the pelvis rearward. Posterior pelvic tilt is the result of shortening the hip extensors and lengthening the hip flexors. Your movement patterns, posture, and other factors may contribute to these changes. 

You can improve posterior pelvic tilt by regularly stretching and strengthening the relevant muscles, just as you do with the exercises for anterior pelvic tilt (which are covered in detail below). Lunges, hamstring stretches, and leg raises are a few of the best exercises. To stretch shortened muscles, you can also use a foam roller.

How to Fix Anterior Pelvic Tilt?

The positive aspect is that most exercises intended to strengthen weak muscles and stretch tight ones can effectively correct anterior pelvic tilt. When you continue with these workouts, your pelvis will eventually return to its normal position.

This condition may also be treated with Osteopathic Manipulative Treatment (OMT/OMM) administered by an Osteopathic physician.

Anterior Pelvic Tilt Exercises

Anterior pelvic tilt can be corrected with the support of these exercises. 

Bridge

Your buttocks and hamstring muscles will get stronger from this exercise.

With your feet hip-width apart on the floor and your arms by your sides, assume a supine position.
When your upper body and thighs are in a straight line, press your heels into the floor and lift your pelvis.
Take a two-second hold, gently lower, and repeat eight to twelve times.

Hip flexor stretch performed half-kneeling

Your hip flexors will become more flexible as a result of this exercise.

With your foot flat on the ground, extend your left leg in front of you and bend it to a 90-degree angle, placing your right knee on the floor just below your pelvis.
Your pelvis will move forward if your buttocks and abdominal muscles are tight.
Step forward with your right leg until you feel tightness in your inner thigh and hip flexor. 
For 30 seconds, hold.
Before swapping legs, release and repeat as much as five times.


Plank

This workout strengthen the abdomen and back muscles. 

On the ground, lie face down.
Put your hands, palms down, on the ground. Hold them squarely beneath your shoulders.
Pull your legs and abdominal muscles tight, then slowly raise your upper body and thighs off the ground to perform a push-up. 
Make sure your body is tight and upright, and that the muscles in your abdomen are working. 
Attempt to hold the stance for as long as you can.
Lower yourself gently to the ground.

Leg lifts on a knee with a back stretch

This workout strengthens your abdominal muscles while stretching the muscles in back and Hip flexors.

Lie on your hands and knees, placing your hips exactly over your knees and your hands shoulder-width apart. 
Maintaining a neutral pelvic position.
Inhaling, pull your belly button in the direction of your spine, and arch your back.
For two seconds, hold.
Reposition your spine to its neutral position.
Raise one leg back until it is parallel to the floor and at the same height as your body. 
Repeat up to 10 times, holding for a maximum of 5 seconds before lowering the leg.
Change your legs.

Pelvic Tilt

This workout stretches the muscles in your lower back and improves your abs.

Place your feet flat on the floor and lie on your back. 
Push your pelvis toward the ceiling by pulling your belly button toward your spine.
Tilt your pelvis forward and contract your hip flexors and buttocks. Hold on for five seconds.
Perform 20 repetitions in 5 sets.


Squats

The hamstrings, quadriceps, buttocks, and other muscles are strengthened by this workout.

Your feet shoulder-width apart when you stand.
Place your slightly toes forward.
Gaze directly ahead and see yourself sitting down.  
As you lower yourself to a sitting position with your thighs parallel to the floor, maintain your abs firm. Maintain a neutral posture for your back and avoid allowing your knees to twist inward or move past your toes.
Resuming an upright posture, slightly advance your pelvis by contracting your buttock muscles. 
Do this fifteen to twenty times.

Anterior Pelvic tilt Treatment in Vastral Physiotherapy Clinic

Anterior pelvic tilt is a frequent condition that can lead to Back pain, disc prolapse, and other complications if not treated timely. Usually, it may be avoided by being active and keeping proper posture, and it can be treated with specific exercises. If, however, you still experience issues, Vastral Physiotherapy Clinic can assist!

Friday, 24 May 2024

Best Hamstring Muscle Exercises

Hamstring Muscle Exercises
The hamstring muscles are the skeletal muscles located in the back of the thigh. You use them for many types of leg movements, including walking, climbing stairs, and squats. Three large muscles that run down the back of the thigh and help in knee and hip movements are called the hamstring muscles.

A hamstring muscle is commonly called the opposite group muscle of quadriceps femoris but it does not mean that both muscles do not work together when you stand with your knee and hip extended, the muscles in both groups coordinate.

Benefits of hamstring exercise include improved tone of muscles, power, and strength in the back thigh.

It mainly focuses on both strength and mobility.

Powerful hamstrings support the back, hips, legs, and knees from injury and aid in their smooth function.

The three muscles which together make up the hamstrings primarily function to flex the knee.

Four muscles form the hamstrings.

  • 1.Biceps femoris – short head
  • 2.Bicepsfemoris – long head
  • 3.Semitendinosus
  • 4.Semimembranosus

Function

Hamstring muscles help in :

Bending the knee joint.

Extending the hip joint.

Rotating the hip joint.

Anatomy

Where are the hamstring muscles located?

The hamstring muscles extend from your hip to your knee, forming the back side of your thigh.

  • Hamstring Muscles
  • Hamstring Muscles
  • Biceps femoris – Long head

Origin: The semitendinosus tendon connects the lower medial facet of the ischial tuberosity to the sacrotuberous ligament.

Insertion: The posterior part of the lateral intermuscular septum, the lateral tibial condyle, and the head of the Fibula

Nerve: Sciatic nerve’s tibial division (L5, S1, and 2)

Biceps femoris – Short head

Origin: The bottom portion of the linea aspers’s lateral lip

Insertion: The posterior part of the lateral intermuscular septum, the lateral tibial condyle, and the head of the fibular

Nerve: Sciatic nerve’s common peroneal division (L5, S1, and 2)

Semitendinosus

Origin: The lower medial aspect of the ischial tuberosity located laterally

Insertion: A vertical line that goes behind the sartorius insert and below the gracilis attachment on the medial surface of the tibia’s medial condyle.

Nerve: Sciatic nerve’s tibial division (L5, S1, and 2)

Semimembranosus

Origin: Anterior lateral facet of the ischial tuberosity.

Insertion: A horizontal notch on the medial tibial condyle’s posteromedial surface

Nerve: Sciatic nerve’s common peroneal division (L5, S1, and 2)

Hamstring Muscle Injuries

A “pulled hamstring” or other hamstring muscle injury is a common occurrence in athletes. They are especially common in athletes who play sports like basketball, soccer, and athletics that call for quick sprints.

Simple, nonsurgical treatments work well for the majority of hamstring strains. There are three types of hamstring strains: pulls, partial tears, and full tears. 

Muscle strains are divided based on how severe they are:

Grades 1, 2, and 3 are the three types of strains.

Grade I: Little structural damage occurs, and the muscle recovers quickly.

Grade II: This suggests that there is only a small break.

Grade III: This refers to a total tear in the muscle and a long time of recovery.

The thick, central part of the muscle (the muscular belly) or the connection of the muscle and tendon threads is where most hamstring injuries happen.

The tendon totally separates from the bone in the most severe hamstring injuries.

It might even drag a piece of bone along with it. The term for it is an avulsion injury.

Causes

The primary cause of hamstring strain is muscle overuse.

This can occur when a sudden load is applied to a muscle that is not used to it.

Strains in the hamstring muscles generally occur when the muscle lengthens or shortens during contraction.

Symptoms

A person will feel a sudden, acute sharp shooting pain in the back of your thigh or knee if you strains their hamstring while running at full speed.

You will have to stop quickly and will either fall or hop on your good leg as a result.

Other symptoms could be:

Swelling in the first hours following an injury during the first few days, you may see bruises or discoloration on the back of your leg below the knee.

Hamstring weakness that may last for several weeks

Risk Factors

Muscle tightness.

Muscle imbalance.

Poor conditioning

Muscle fatigue.

Diagnosis

Doctor Examination

Patient’s history and physical discomfort People who have hamstring strains often go to a physician due to acute back thigh pain that comes up after exercise.

The doctor will ask about the injuries and feel for any tenderness or bruises on your thigh during the physical examination.

To check for discomfort, weakness, swelling, or a more serious muscle injury, he or she will press or palpate the back of your leg.

Imaging tests

X-rays

The doctor can determine if you have a hamstring tendon avulsion by looking at an X-ray. This is the result of a little piece of bone being dragged away by the damaged tendon.

Magnetic Resonance Imaging (MRI)

Enhanced pictures of soft tissues, such as the hamstring muscles, can be produced by this research.

It can assist your physician in assessing the degree of the damage.

Treatment

The program of treatment for hamstring strains will vary based on the severity of the injury, how severe it is, and your personal objectives and needs.

Benefits of hamstring training

Increasing posterior thigh strength will help with hip extension and knee flexion.

Reducing injuries: When performing a severe physical activity like running, it can be less likely that the hamstrings will strain or rupture.

Increasing flexibility: Stretches for the hamstrings help improve the hip range of motion and flexibility. People am able to perform daily duties like bending over and walking upstairs with the help of these two advantages.

Improving posture: The hamstring muscles cause the pelvis to rotate backward when they are excessively tight this can flatten the natural arch in the back, which can cause poor seated and standing posture.

Preventing lower back pain: Tight hamstrings limit the pelvis’s range of motion, which may strain the lower back. To avoid them getting too tight, you can strengthen and stretch your hamstrings, which will also give your back and pelvis additional support.

help in improving the flow of blood.

reduce the risk of injury and reduce muscle fatigue.

Reduce your chance of sciatica pain, tingling, and numbness in the back of the leg. help in preventing delayed muscle soreness from starting.

Hamstring strengthening exercises

The following hamstring strengthening exercises are designed to improve the strength of the hamstring Muscles First, you should do the following simple exercise three times a day, for approximately 10 repetitions, to strengthen your hamstrings.

The exercise can be improved as your hamstring strength increases by progressively increasing the repetitions and contraction pressure, as long as it does not aggravate or create pain.

Programe for strengthening the hamstring muscles

Stage 1: Isometric hamstring load

It is suggested that isometric exercises performed in non-tendon compressing positions are beneficial to loading the muscle-tendon unit and reduce pain in patients with irritating symptoms of proximal hamstring tendinopathy.

It has been reported that pain can be inhibited by isometric exercise. Isometric exercises should ideally be performed multiple times a day.

The dosage is decided based on irritation and the severity of the symptoms.

Depending on the symptoms, the dosage can be changed to produce shorter or less forceful contractions, or vice versa.

Hip position may be in neutral hip flexion and extension or in mild hip flexion (20°–30° for straight leg pulldowns) in the initial phases of proximal hamstring tendinopathy. A rapid decrease in pain with hamstring loading tests following exercise is suggestive of isometric hamstring loading.

Appropriate exercises for stage I rehabilitation:

1 . Isometric hamstring curl

2. Bridge holds – hip in neutral

3. Isometric straight-leg pulldowns

4. Isometric long leg bridging on two, progressing to one leg holds

Static Hamstring Contraction

Start this exercise by bending your knee to around a 45-degree angle while sitting.

Tighten the hamstrings (the back of your thigh) by pressing your heel into the ground. Hold for 5 seconds, then 10 times as forcefully and gently as you can.

Intermediate Hamstring Exercises

As long as they don’t increase any pain, performing the following intermediate hamstring strengthening exercises one to three times a week is generally recommended.

It is suggested not to perform exercises back-to-back days to allow muscles to recover. The hamstring exercises can be advanced as your strength increases by progressively adding repetitions or resistance, as long as the exercises don’t aggravate current issues.

Bridging

Start this exercise by lying on your back in the way shown in the figure. Raise your bottom gradually while maintaining a straight posture at the hips, knees, and shoulders by pressing through your feet.

As you do this, tighten the hamstrings, which are located in the back of your thigh.

After two seconds of holding, softly lower your bottom again. Perform a total of 3 sets of 10 repetitions, if you are not in pain during the exercise.

Progression

Single Leg Bridge

The basic bridge is the same. As you raise yourself into the bridge position, raise one foot from the ground and extend your knee as demonstrated.

This is similar to the simple bridge posture. After 3-5 seconds of holding, bring the foot back to the floor.

Hamstring Curls

Holding on a chair or table for balance, stand up. Raise your foot as high as you can and bring it back behind you towards your glutes.

After three seconds of holding, carefully lower the foot to the ground. hamstring curl progression with resistance bands.

Progression

Resistance Band Hamstring Curl

Start this exercise by placing a resistance band around your ankle while lying on your stomach, as shown.

Bend your knee slowly while tightening your hamstrings, and the back of your thigh. Perform 3 sets of 10 repetitions, if you are not in pain during the exercise.

Stage 2: Isotonic hamstring load with minimal hip flexion

Rehabilitating proximal hamstring tendinopathy involves the following crucial elements:

To restore hamstring strength

To regain the mass and functional range of motion of the hamstring muscles

When there is little or no discomfort (VAS 0–3 out of 10) during hamstring loading in the early ranges of hip flexion, isotonic hamstring loading may be started. There is inadequate information to separate the eccentric component of eccentric exercises, given the fact that these exercises are commonly acknowledged as the most effective therapy for tendinopathies.

The goal of Heavy Slow Resistance is to finish a resisted isotonic activity that is slowly tired. Increase to 8 RM after starting at 15 RM, which is the most load that may be raised 15 times in a single set. Perform 3 to 4 sets every other or every other day. For three seconds, hold each contraction during the exercise’s eccentric and concentric phases.

Reduce early-stage loaded hip flexion to a minimum. In order to protect the enthesis from excessive compression, this is indicated. In order to oppose uneven strength loss, the major focus should be on single-leg work. On the “off” days, keep up with the stage 1 isometric exercises. In particular, if symptoms are still constant, this will aid with pain.

Appropriate exercise for stage 2

Prone hip extension

With your legs straight, lie on your stomach on the ground. Head on with both arms, please. Elevate your right leg a few inches above the ground. Maintain a straight right knee. Hold on for five seconds. Adjust your leg slowly. Repeat according to instructions five times. If directed, switch legs and repeat.

Prone leg curl

start this exercise by placing a resistance band around your ankle while lying on your stomach, as shown. Bend your knee slowly while tightening your hamstrings, and the back of your thigh. Perform 3 sets of 10 repetitions.

Stage 3: Isotonic exercises in Elevated hip flexion (70° to 90°)

At this point, rehabilitation’s goal is:

To maintain muscle growth in more hip flexion,

To keep up hamstring muscle strengthening in more hip flexion, and

To maintain functional training in more hip flexion

Isotonic strengthening in increased hip flexion can be used once there is little or no discomfort (VAS 0–3 out of 10) with higher loading hip flexion tests like lunging & arabesques. Exercise dosage and frequency are the same as they were in stage 2.

The right technique is important, and the exercises can be done carefully and slowly.

Monitoring the 24-hour response following exercise with loading tests into hip flexion is essential since the transition into higher hip flexion frequently results in pain and irritation (hamstring bridge, deadlift, single-leg arabesque).

Appropriate exercises for Stage 3

Slow hip thrusts

We understand that not everyone has access to a bench or a hip thrust machine.

A couch gives an ideal height and sufficient cushioning for performing a hip thrust. Place your back against the couch to begin. Position your shoulder blades so that they are at the edge. feet placed on the ground. Lift your knees and plant your feet firmly on the ground. Raise your hips towards the ceiling by using your glutes.

Return your hips to the floor by hanging them. If you have a weight accessible, you can always choose not to use it.

Forward step-ups

Find a step, chair, box, or bench high enough so that your knee will bend to a 90-degree angle when you set your foot on it before you begin.

A dining room chair can work just as well for an at-home strength training session however, plyo boxes or weight benches are usually the perfect height.

Walking Lunges

Place your feet hip-width apart and stand upright. With your right leg extended and your weight on your heel, take a step forward.

Bend your right knee and lower yourself such that your knee is parallel to the floor in a lunge position as soon as your right foot hits the floor and stabilizes.

Deadlifts

Barbell deadlift: Get the barbell ready. Depending on your strength and degree of fitness, add plates to the barbell that is on the ground in front of you. Start with less weight if this is your first time deadlifting. Later on, it is always simple to add weight. Prior to pushing your physical limits, you should polish your form. Using clips, firmly fasten the plates on the barbell to prevent them from slipping.

Romanian deadlifts: Patients with proximal hamstring tendinopathy should be able to load their proximal hamstrings over ranges specific to their sport with little discomfort at the end of phase 3.

Stage 4: Energy storage loading

This stage is only necessary for patients and athletes who are returning to sports that require lower limb energy storage or impact loading. When there is little discomfort during load tests (VAS 0–3 out of 10) the myotendinous unit can begin to receive power or elastic stimuli.

In phases 2 and 3, it is also essential to have sufficient bilateral strength when performing single-leg activities.

It also requires good control over movement. To prevent compression of the tendon and the proximal hamstring, it is recommended to minimize hip flexion during the early stages of stage 4. Keep in mind that this is the most intense phase of the recovery process and that the frequency and dosage of the recommended workouts should be chosen carefully.

Begin by exercising only once every third day. After that, let the tendon a stage 1 day to settle down. Then, stage 2-3 strengthening workouts will be performed the next day. This equals two times a week, three-day cycles of high, low, and medium tendon load, separated by a rest day.

Appropriate exercise for stage 4

  • Sprinter leg curl
  • A-skips
  • Fast sled push or pull
  • Alternate leg split
  • SquatsBounding
  • Stair or hill bounding
  • Kettlebell swings
  • Lateral, rotational cutting movements

Hamstring stretching exercises

Many exercises can reduce hamstring tightness and minimize the chance of injury. Stretching your hamstrings while seated, lying down, leaning against a wall, and other positions is possible.

Stretches for the hamstrings help maintain the muscles’ flexibility and mobility. Pain shouldn’t come from the stretches.

Stretching should only be done until mild to moderate tension is present. People should avoid overstretching because it might be harmful.

Over time, flexibility gets better. You may stretch your hamstrings in a lot of different ways to keep them loose. Warming up the muscles before stretching is the best course of action. To get your muscles heated, try taking a walk or trying some other activity. To relieve tightness in the hamstring muscles, you can stretch as follows:

Lying hamstring stretch

Step 1: Lie flat on the ground or a mat with the legs stretched out.

Step 2: Holding the back of the right knee with both hands, bring it up towards the chest, and gradually straighten the leg to stretch it

Step 3: Stretch for ten to thirty seconds.

Step 4: Repeat 2–3 times on each leg.

Lying hamstring stretch using a strap

Step 1: Lie flat on the ground or a mat with the legs stretched out.

Step 2: Bend the right leg and place the strap over the right foot’s ball to straighten the leg.

Step 3: Hold the strap in both hands.

Step 4: Maintain your left leg extended and your foot flexed on the ground. The calf and thigh should be forced towards the ground as a result.

Step 5: Raise your right leg slowly while keeping your foot flexed. The right leg needs to be straight with a small knee bend. The foot’s bottom needs to be facing the ceiling.

Step 6: Gently pull the strap until there is a slight tension in the hamstrings. Hold the stretch for 10–30 seconds

Step 7: Switch legs. Repeat 2–4 times on each leg.

Lying hamstring stretch using a wall

Step 1: Lie flat on the ground or a mat, with the back flat and the left leg placed completely on the ground. The left leg should be able to pass through the door opening.

Step 2: The right foot should be leaned on the wall near the door.

Step 3: To create a slight pressure on the right leg, change the distance between the body and the wall.

Step 4: Hold the stretch for 10–30 seconds. Switch legs. Repeat 3 times on each leg.

Sitting hamstring stretch

Step 1: Sit on the ground with your left leg bent at the knee and your foot facing inward to stretch your right leg. We call it the butterfly position.

Step 2: Stretch out your right leg while bending it slightly at the knee. Keep your back straight while leaning forward at the waist.

Step 3: Hold the stretch for 10–30 seconds. Switch legs. Repeat 2–3 times on each leg.

Sitting hamstring stretch using a chair

Step 1: Sit on a chair with your back straight and closer to the border of the seat.

Step 2: Keep one foot flat on the floor the other leg on a chair and extend it out in front of you.

Step 3: Bend the body forward gradually until the back of the thigh is clearly stretched. Make sure the shoulders don’t fall forward and your back is in a neutral position.

Step 4: Hold the stretch for 10–30 seconds. Switch legs. Repeat 2–4 times on each leg.

Standing hamstring stretch

Step 1: Stand upright with the spine in a neutral position.

Step 2: Place the right leg in front of the body with the foot flexed, the heel pushed into the ground, and the toe pointing toward the ceiling. Slightly bend the left knee.

Step 3: Gently lean forward and place the hands on the straight right leg. Keep a neutral spine.

Step 4: Hold the stretch for 10–30 seconds. Switch legs. Repeat 2–4 times on each leg.

Standing hamstring stretch using a table

Step 1: Use a table that is just shorter than hip height.

Step 2: Stand upright with the spine in a neutral position.

Step 3: Place the right leg on the table with the foot flexed so the toes point toward the ceiling. Just the foot and a portion of the calf should rest on the table as you stand far enough away from it.

Step 4: Once the hamstring muscle stretches, bend forward at the waist. Bend forward slightly, holding yourself with both hands on the table or leg, to increase the stretch.

Step 5: Hold the stretch for up to 30 seconds. After a 15-second break between each repetition, perform three repetitions on each leg.

Runner’s hamstring stretch

The runner’s stretch is a common flexibility exercise for hamstringsPlace your hands on the wall at shoulder height and shoulder width apart while standing one foot away from a wall. Step back with one leg and press against the wall.

Maintain a straight back and gently place your heels on the ground. Hold for a duration of 15-30 seconds. Repeat with the second leg as you take a step forward. Do the exercise three times on each side.

Foam roll hamstring stretch

Step 1: Sit on the floor with the legs stretched straight in front.

Step 2: Fold the opposite leg, keeping the foot straight on the ground, and place the foam roll directly below the hamstring of one leg.

Step 3: Raise your buttocks from the mat while keeping your hands flat on the ground to maintain balance. Long, spreading motions should be made back and forth with the body, finishing just short of the back of the knee.

Step 4: To ensure that the roller covers the right, left, and middle hamstring muscles, gently twist the thigh. With the opposite leg, repeat the stretch.

Mistakes to Avoid During Hamstring Stretch

There are some mistakes you should avoid during the stretch

Knee bending: Try to maintain your legs straight when sitting for the ideal hamstring stretch. Simply reduce the amount of forward stretch you do if your hamstrings are tight and you must bend your knees. because it takes time to increase hamstring flexibility.

Hunching over: Instead of hunching over from the shoulders, try to bend at the level of your hips. Imagine attempting to maintain a normal spine while reaching “up and over the legs.” Maintaining a neutral spine as well as preventing bending to touch your toes is an excellent practice.

Bouncing: Rather than causing a decrease in muscle contraction, it may cause the stretch reflex to be triggered. This may lessen the benefits of the stretch and raise the possibility of harm.

Benefits of hamstring stretches

Preventing lower back pain: Tight hamstrings limit the pelvis’s range of motion, which may strain the lower back. To avoid them getting too tight, you can strengthen and stretch your hamstrings, which will also give your back and pelvis additional support.

Reducing injuries: When performing an intense physical activity like running, it can be less likely that the hamstrings will strain or rupture.

Increasing flexibility: Stretches for the hamstrings help improve the hip range of motion and flexibility. People am able to perform daily duties like bending over and walking upstairs with the help of these two advantages.

Improving posture: The hamstring muscles cause the pelvis to rotate backward when they are excessively Tight This can flatten the natural arch in the back, which can cause poor seated and standing posture. People can sit more erect and stand taller by maintaining relaxed hamstrings.

Some yoga to Strengthen the hamstring muscle

Here are five of my best hamstring-strengthening exercises.

Triangle Pose

Set you the same as in Crescent Pose Place the left foot flat on the ground, pointing the toes towards the upper left corner of the mat.

Facing the left side wall, turn the trunk. Both arms must be extended toward the front and rear walls.

The head rotates to face the floor’s front. Raise your right leg straight, take a deep breath, and extend your right hand as far as possible forward. When your reach is limited, release your hold and bend your waist to bring your hand down to your mat. Lift your left hand up toward the ceiling and observe the fingers there. You even use much more leg and core strength to raise the arms above the head.

Chair-pose

You must stand with your feet and hips spaced apart. Next, visualize yourself seated on a chair and bend both knees till the thigh is parallel to the floor. Even though the spine may be straight, maintain your heels for balance.

Hold both hands in the prayer posture, either at the level of your chest or above your head, for five to ten seconds. Next, remove your hand so that you can stand up.

Crescent-knee-lifts

To activate the leg, you must remain on your right toes and reach through your heels. Bring the left knee up to a 90-degree bend.

You can place your hands in the pose of prayer at chest height or cross your arms over your head. You must raise and lower your right foot from this position before exhaling. Stay in this posture for three to four seconds.

Simply stand, then step back with your right foot around three feet to complete this stance.

Warrior pose

is also called Virabhadrasana III You have to first take a Crescent Pose Breathe out & bend the right knee & on the breath push through the foot to rise up on the straight left leg. Flex the right foot & push through it as if you are standing on the wall just behind you. You can also adopt a praying position or simply maintain both arms extended toward the wall in front of you. hold this position for 5 – 6 seconds. If you would like to combine the Warrior III pose & Crescent Knee Lifts breathe in the Warrior III pose then breathe in float back down into a crescent pose, breathe out & touch the knee to the floor, and breathe back into the Warrior All pose.

Bow Pose

This requires you to lie on your stomach. your hip and feet distance apart Keeping the feet and hips distance apart, bend at the knees & reach back to grab the tops of your feet with your hands. Breathe in and raise yourself up by pressing your feet into your hands. Resume pushing with the feet, while pulling with the hands.

Hold this position for 3-5 seconds. Protect the back by activating the core, and hugging the belly button to the spine. So, while you may have the aim of touching the nose to the knee, be sure to keep in mind the concept of balancing the body by including

As well as the stretches, engage in hamstring strengthening activities.When completing a posture, avoid overstretching your body to meet an impossible standard.

You may increase your hamstring strength and maintain these essential muscles in a happy and healthy body by incorporating these easy workouts into your weekly fitness routine. In yoga positions, equilibrium is always the goal. Keep that in mind.

It is important that we are stronger & flexible to keep our bodies perfectly supported on & off yoga mats.

Upward plank pose Purvottanasana-upward-plank-pose

You can remove or withdraw the block between your thighs from Bridge Pose. Drop your hips to the ground and rise up to take a seat. Put your hands on either side of your outer hips. Lift both your back and hips after applying pressure with your hands and feet together. You’ll have your shoulders built over your wrists.

Raise your arms straight. on tighten your hamstrings, keep applying pressure on your feet with your entire body weight.

Maintain the downward release of the inside of your thighs as you extend your sitting bones to the knee supports. Spread out your body equally. You can continue to point your toes and keep your knees bent. When your head falls back, either stretch your neck or tuck your chin gently into your chest.

Option: Straighten your legs as the four corners of your feet press down evenly. Keep the muscles in your thighs releasing downward. Maintain here for 5-10 breaths.

Head of the Knee Pose

Janu Sirsasana (Head of the Knee Pose)Using a bolster and blanket, sit up straight. Place your right foot inside your inner calf or thigh and extend your left leg straight ahead of you.To reduce the discomfort of the position, place a rolled-up blanket between your bent and straight knee.

Your outstretched foot should be twisted around the yoga strap. Draw your foot towards your torso and flex it. Lean up towards your left foot if that is comfortable for you.

the test of releasing the strap while holding to the foot, ankle, or leg muscle. Continue for five to ten breaths. Repeat on the opposite side.

Standing forward bend (uttanasana)

Place your feet hip-width apart as you walk. With your palms facing your shins or the ground, fold forward and attach at your hips. In this position, gravity assists in lengthening the hamstring stretch.

Standing Wide-Legged Forward Bend (Prasarita Padottanasana)

Put your feet wide apart as you stand. Bend forward, keeping your back straight, and extend your hands to the floor. The hamstrings can be stretched farther in this position.

Downward Facing Dog (Adho Mukha Svanasana)

Take a plank position to start. To form an inverted V, raise and extend your hips. Press your heels down towards the floor to activate your hamstrings. Roll out to Plank Pose for a little while, keeping your wrists beneath your shoulders and your hips raised to a height that’s approximately equal to your shoulders, if you’re not sure where to place your hands or feet.

After that, raise your hips to return to Down Dog. As you bring your heels down to the floor, lift the weight of your hips and upper body up and out of your wrists.

Safety and Precautions during Yoga Pose for Hamstring Strengthening

Keep in mind to begin carefully, use support if necessary, and practice consistently.

Increase the flexibility of your hamstrings gradually to avoid strainKeep in mind that your heels might not contact the floor, and if your hamstrings are tight, you might need to bend your knees

Start Gradually: Start with simple stretches and progress to more difficult positions. rushing through vigorous stretches might lead to soreness or damage.

Pay attention to your body: Observe the body’s response to each position. Adjust the stretch and ease yourself if you feel pain or discomfort.

Warm Up: Prior to prolonging your hamstrings, always warm up. Your muscles can be better prepared with a few minutes of dynamic stretches and light activity.

Prevent from overstretching: since this can lead to hamstring pain. Aim for a comfortable stretch without going over your limitations.

What precautions should be taken during exercises?

Make sure you always warm up properly before the competition or rain.

Hamstring stretches should be performed both before and after exercise.

Stretch every day, whether you participate in any kind of exercise. To handle the pressures placed on them, strengthen the muscles. Eccentric strengthening in particular is important. Get a sports massage on a regular basis to maintain the health of your tendons and muscles. Stay clear of heavy hill work and accelerating/decelerating runs.

Saturday, 18 May 2024

Calf Muscle Exercises

Introduction

Calf Muscle Exercises

The muscle known as the calf (Latin: Sura) is located behind the tibia, or back of the lower leg.

It is composed of the gastrocnemius, soleus, and plantaris muscles. You can walk, run, jump, stand on your toes, and flex your foot—that is, push your toes down towards the ground—thanks to the muscles in your lower legs.

The largest muscles in this area are the soleus and gastrocnemius. The muscle with two heads, the medial and lateral, is the gastrocnemius. The two heads of the gastrocnemius muscle join to form a combined muscle belly.

Origin and insertion:

The medial head originates from the posterior, non-articular portion of the medial femoral condyle, whereas the lateral head forms from the lateral surface of the lateral femoral condyle

The tendon that connects to the posterior calcaneus is called the calcaneal tendon, or Achilles tendon, and it is formed where the gastrocnemius muscular belly joins the soleus muscle.

The ankle joint is supplied by the planters, whereas the tibial nerve supplies the calf muscle. Large and flat, the soleus muscle is located deep within the gastrocnemius. The tendon part of the plantaris muscle, despite its tiny size, is quite lengthy.

With a very lengthy tendonous part, the plantaris is a tiny muscle. A nerve can be mistakenly identified as the tendinous part.

As well as being totally absent in as many as 10% of the population, the plantaris muscle originates in the lateral supracondylar line of the femur. The muscle goes down medially and finally develops into a tendon that passes between the gastrocnemius and soleus muscles lower in the leg.

The calcaneal tendon joins forces with this tendon

Exercises for the calf muscles involve both strengthening and stretching movements.

Strengthening exercises provide improved weight management, balance, stronger bones, increased muscle mass, and joint flexibility. Stretching exercises increase muscle blood flow, allow joints to move through their full range of motion, reduce the chance of injury, and improve physical performance.

Enhance your capacity to perform daily tasks by allowing your muscles to function at their peak.

Anatomy

The lower leg’s back contains the calf muscle. It has two muscles: the soleus and the gastrocnemius.

The point where these two muscles combine is the Achilles tendon, which connects to the heel directly. These muscles are used in any leg or foot movement.

The calf muscle is composed of 2 main muscles: The gastrocnemius is the larger thigh muscle that creates the bulge beneath the skin.

A flat muscle called the soleus is located below the gastrocnemius.

The heel bone contains the Achilles tendon. (calcaneus)

The plantaris is a little muscle that runs the length of the lower leg between the gastrocnemius and soleus muscles.

The triceps surae are the name given by providers to these three muscles.

What is calf muscle exercise?

Calf muscle exercise is very helpful to make your lower leg strong, and flexible and has many health benefits.

Calf muscle exercise includes different types of exercises such as stretching exercises and strengthening exercises which help in improving Joint flexibility, Increasing muscle mass, making bones strong, Weight control, & Balance.

Where stretching exercises help to improve performance in physical activities, reduce the risk of injuries, also help the joints move through their full range of motion, & Increase muscle blood flow.

Calf muscle exercise includes 2 types

  • Calf muscle Strengthening exercise
  • Calf muscle Stretching exercise

What is calf muscle strengthening exercise?

Calf strengthening exercises designed to develop the calf muscles are an excellent way to build their power and strength while also increasing their level of fitness.

This is a great article to read if you want to build up the calf muscles on the back of your leg.

Although it is a muscle that is essential to controlling the movement of the ankle joints, the calf tends to get ignored in training. A strong calf may improve foot function, such as taking toes towards the knees, rising onto toes, and turning feet in and out, and help prevent ankle problems.

You can run, jump, and walk with these movements.

This article covers the top exercises you can perform at home to strengthen your calf muscles as well as the advantages of exercise for your health.

The calf is prone to strain and injuries since they are used in many of the daily movements you perform.

Strong legs and muscles may help in the recovery from current injuries or protect the lower leg from further harm.

As strong calf support tendons like the Achilles, they can help you if you have mobility issues.

Additionally strengthening the calf can help those with plantar fasciitis and knee pain reduce their symptoms.

Make sure you visit a physician before doing this activity if you have any injuries or problems.

Due to the fast-twitch muscle fibers in the calf, having strong calves can help athletes perform better, particularly during sudden bursts of power and speed.

Particular calf-strengthening exercises should be performed if individuals participate in jumping or fast-moving sports like basketball, soccer, running, or cycling.

The calf muscles, which are made up of the gastrocnemius and soleus, support your ankle joint in addition to other muscles in your legs.

The more important component of the calf muscles that gives the form you see is the gastrocnemius. It includes two diamond-shaped heads with a split in the middle that you might be able to see if you gain muscle and become skinny.

The soleus is the little muscle that lays below the gastrocnemius.

Many calf exercises focus soleus and gastrocnemius, whereas other exercises focus only on one.

There are several weight and balanced workouts that will assist build stronger calves, but some aerobic activities are especially beneficial.

Remember to stretch to cool down after the workout and to warm up with mobility exercises.

The health benefits of calf strengthening exercise.

Calf strengthening helps in improving performance.

People who suffered knee pain & plantar fasciitis can improve their symptoms by strengthening their calves as well.

Stronger & flexible calf muscles give you better balance & stability.

Our entire lower body performance depends on the strength of the calf muscles.

Runners, if you want to improve your speed then do calf raises. Avoid calf raising in any type of calf injuries Good agility when jumping & running.

More explosive, rapid motion Great exercise for runners Calf exercise can also detect an older person’s ability to do activities of daily Living It

Helps to reduce the risk of ankle & foot injuries.

Give stability to the ankle and foot.

Strengthening exercises of the calf muscle:

Seated Calf Raise

Seated calf raise
Seated calf raise

The calf raise equipment must be available for the sitting calf raise. Alternatively, you may try holding something heavy in your lap, although this may not provide enough weight to adequately use your muscles. Here, the gastrocnemius is not used because the knees are bent. The soleus muscle is activated during calf lifts when seated.

Steps:

When seated, keep your upper thighs under the pad on the calf raise machine. Your knees should be just over the pad.

You should place the heel of your feet on the footplate

Keeping your feet on the objects, drop your heels as low as you can.

Lift your heels gradually and press your toes into the pad.

Continue until your calves start to get a stretch. Then, maintain the pose for one count before bringing yourself back to the starting position.

10 to 15 times, repeat.

Standing Dumbbell or Barbell Calf Raise

The gastrocnemius muscle in the calf is worked during standing dumbbell and barbell calf raises. You can perform this exercise with weight plates adjusted to the heels of your feet on a gym step. Use a barbell or dumbbell, and perform the exercise slowly and carefully.

Standing Dumbbell or Barbell Calf Raise
Steps:

Put the heel of your feet and toes on a step or weight plate. Your heels and arches are supposed to extend over the step.

Arrange the barbell such that it rests on your trap muscles as well as across your shoulders.

As you raise your heels as high as you can, contract your core and maintain a flat back.

At the highest point of the contraction, pause for one count, then lower yourself gradually.

Although they shouldn’t touch the ground, your heels should be below parallel.10 to 15 times, repeat.

Body weight Calf Raise

Body weight Calf Raise
Steps:

Targeting the gastrocnemius, this exercise is easy to do on stairs, workout steps, or any flat, solid surface with a border.

This exercise can even be performed on level ground. It’s likely that you’ll want to have a supportive object close by.

Pulling or pushing on the support for help when using your body weight is challenging.

You can try doing this exercise on one leg at a time to make it more challenging.

You have to stand straight and place your feet hip-width apart for this exercise. Your back may also be in a neutral position, and your core may be active.

For balance, stand close to a wall or other support, or put your hands by your sides.Lift yourself on the balls of your feet while concentrating on your calf muscles.

After experiencing the calf contract for a few seconds, release the heels below parallel or, if you’re not using a step, return them to the floor.

Do 15-20 repetitions.

Barbell Split Squats

Steps:

Barbell Split Squats exercise will train the entire legs, but there is a significant focus on the calf.

For people who are short on time and want to work out the calf as well as the other muscles in their legs, this workout is great.

Set the barbell in a squat rack to the required weight.

Place a barbell across the shoulder, pressing it against the trapezius muscles.

Now remove the barbell from the rack and take a step back; your core muscles may be braced.

Leaving the left foot behind, advance with your right foot.

Bring the left knee down to the floor. Push through your right front foot and bring your leg back up to a standing position.

Remain in a divided posture and resist putting your feet back together. Repeat each slide 10 to 12 times.

Calf Raise with leg press machine

If you don’t have seated calf raise equipment or find using a barbell difficult, using the leg press machine at the gym is another option for calf raises. Your upper body is supported by the leg press machine, keeping you from maintaining balance. Avoid this workout if you have knee pain or injury.

Steps:

Place your feet flat on the plate, shoulder-width apart, and sit on a leg press machine.

Until your legs are almost locked out but not quite, use the balls of your feet to push the plate away from your body. For a count, push on a step back, then take a step back and proceed on flat feet.

Try doing this 10-15 times.

Single-Legged Forward Leaning Calf Raise

To improve more calf strength, try the single-leg forward-angled calf raise. A lower surface will lower the resistance.

It is also easier if you attempt this with both feet at the same time. Although the soleus muscle is also worked, the gastrocnemius is the main goal of this exercise.

Steps:

Place your back to a loaded bar or a vertical surface.

Using an overhand grasp larger than your shoulder breadth, hold the handle. With your arms outstretched and your body inclined forward, step back with your feet.

Lengthen your ankle as much as possible to elevate the heel of your standing leg.

It is important that your body moves at an angle and in a straight path.

After holding for a count, your working calf should contract.

Calf Raise with wall Sit:

The wall sit calf raise can be performed as a set of calf raise repetitions or as an isometric exercise in which the contraction remains the entire time. You will improve your muscle endurance and strength by holding the exercise. Correct form is necessary for this exercise to be effective.

Steps:

Place your feet about two feet apart from a wall and stand with your back facing straight towards it.

Keeping your core in place, slide your back down the wall until your thighs are parallel to the floor and at a 90-degree angle.

Instead of being on your toes, your knees should be just above your ankles.

Push through both heels and the toes of your feet by raising your heels off the floor.

Take a few seconds to place your back straight on the wall. As an alternative, you might drop your heels once more and raise them back up by repeating the motion.

Repeat the exercise three times, pausing for 30 seconds between sets, if you are holding the exercise.

Jumping Calf Press

Plyometric training like the soaring calf press, which is an excellent bodyweight exercise for your calf, will help you develop strength and explosiveness.

You can choose to jump once, land, and then wait for an amount of time before jumping again, or you can jump frequently in succession, rising back up as soon as you touch.

Steps:

Maintain a natural stance with your back straight, hands by your sides, and your core relaxed.

Use the heel of your feet to lift yourself off the ground and into the air.

Rather than depending only on your quadriceps to power your jump, concentrate on the tension and tightness in the calf muscles.

Do this 10 times.

Jump Rope Calf raise

Jumping rope is a great way to strengthen the calf and improve your cardiovascular health.

Your calf will become stronger and more powerful as a result of jumping frequently off the balls of your feet.

Steps:

With both hands, grasp the handle of a jump rope and place it behind you in the middle.

Hold the rope ends away from your body so that they are parallel to your hips.

Swing the rope above your head by rotating your wrists. Jump over the rope as it swings down in front of you.

Farmers Walk on Toes

Steps:

Hold large dumbbells close to your sides.

Lift yourself up onto your toes and take a forty to fifty-second step forward.

Put on more weight if you think you could have gone longer than 60 seconds. Perform two or three sets.

Jumping lunges

Steps:

Beginning in a standing position, move forward with your left foot, lower your right knee to the floor, and perform a lunge.

In order to jump into the air and land in a lunge with the right leg front, push through your left heel.

Use your arms for momentum.

Repeat the lunge jump with the left leg. That’s one repetition. Perform two sets of 10-15 repetitions.

Cycling

Riding a bicycle is a great, weight-free method of strengthening your calf muscles inside or out. Although weight training is essential for building muscle, cross-training with aerobic exercises like cycling can enhance your muscular endurance and calf strength.

Get the most out of your cycling for calf strength with these form recommendations.

Steps:

To reach the handlebars, push forward while keeping your back low by adjusting the seat of your bike.

Pull your abdominals and back muscles together to support your forward-bending posture by activating your core.

Put a bicycle at its highest speed and warm up. Keeping your legs tight as you push down, press in rhythm with the pedal’s rotation.

Once you feel the strain and contractions in your legs, shift the gear to a higher resistance and continue pressing with your leg muscles for a few minutes.

Running

Running is a full-body exercise, but as you run up or down stairs, your calf muscles will work extra hard to get you moving. Whenever you sprint, always warm up with a slow run mixed in with a few fast moves. If you feel pain, stop.

Steps:

Step quickly and with one of your legs pressed into the ground. Gradually increase the distance between your forceful steps.

To advance, push your arms from your chin to your hips. To move forward, raise your front knee with each stride and straighten your back leg.

Reduce your speed gradually and stop short of injuring your knees.

After your sprint is over, let your pulse rate calm before starting again.

What are calf stretching exercises?

Calf stretching exercises that increase lower limb flexibility, lessen injury risk, and promote other health advantages include calf stretching.

Warming up with this activity is highly advised and can enhance your overall fitness level if done on a regular basis.

There are many reasons why the calf muscles could feel tight.

The two muscles that comprise the calf are the gastrocnemius and soleus.

Walking everywhere and getting involved in vigorous activities regularly activate these muscles.

The lower leg’s back and sides have a network of muscles and tendons that make up the calf.

The gastrocnemius muscle is a huge muscle located right below the back of the knee, whereas the soleus muscle is a lengthy muscle located on the side and downward portion of the calf.

The Achilles tendon connects both components to the heel. Their lack of flexibility might affect how you transfer your weight and how much pressure you apply to different parts of your body when you move.

The ankle, foot, and knee could not work as they should as a result. You can become injured or experience pain and tightness as a result, which would prevent you from practicing your favorite hobbies.

There are many reasons why one could experience calf pain, including weak and tight lower leg muscles or injuries like sprains or pulls.

Although the discomfort may not be severe enough for a visit to the doctor, it can still affect your level of enjoyment and fitness.

Calf stretches can help reduce tightness and inflammation in the muscles.

Stretching should always begin with a few minutes of cardiovascular exercise or a warm bath.

It’s also important to take your time and properly stretch your muscles after working out.

What are the causes of tight calf muscles?

Overuse is frequently the cause of a calf that is tight or painful.

Playing sports and jogging can put a lot of strain on your calf muscles. Sports requiring endurance are very stressful on the body.

Health benefits of calf stretching exercises:

There are some advantages & benefits of the calf stretch:

Strengthen the muscles in your calf muscles Because the calf muscles are used for so many daily activities, such as walking and standing, they are prone to fatigue and tightness.

  • Reduce soreness in the muscles.
  • Increase your long-term flexibility.
  • improve your range of motion in the short time.
  • increase your range of motion. like plantar flexion of the ankle.
  • It also facilitates knee locking.
  • Boost the blood flow to your leg.
  • Leg cramps should occur less frequently.
  • Prevent Shin Splints and Achilles Tendinitis

You could experience everything from mild discomfort to excruciating pain when your muscles are cramping.

The duration of cramping can range from a few seconds to fifteen minutes, or even more.

Cramping may start as soon as you exercise or as much as 4 or 6 hours later.

Other symptoms may include:

unexpected soreness behind the knee or in the leg

Having difficulty staying on your toes

pain swelling, or bruising

More pain, especially when resistance is applied to the muscles

Peripheral vascular disease

Deep vein thrombosis

Muscle tear

Poor circulation

Dehydration


Stretching exercises for calf muscles

Toes on the Wall Stretch

In front of a wall, take a split stance, placing one foot near the wall and the other approximately one foot back.

Put your hands up against the wall.

With your toes pressed up against the wall and your heel on the floor, bring your front foot in close proximity to it.

Feel the stretch in the bottom portion of your front leg when you place your weight on your front foot.

To make the stretch stronger, raise the back of your foot’s toes while pulling your chest towards the wall.

Hold for 20-30 seconds at both sides.

Make sure your front heel is firmly planted on the floor and wear trainers so you can hold your grip on the wall for optimal benefits from this calf stretch.

The lower calf and Achilles tendon are the focus of this stretch.

Forward Fold

Place your hands by your sides, your feet together, your shoulders back, your chest proud, and your eyes straight forward.

Breathe in, and as you exhale, tip your chin to your chest, then slowly roll down, bringing your head towards the floor.

As you gently fold your chest forward toward your thighs, visualize moving each vertebra one at a time.

After folding forward, you can, as shown, softly press both hands into the floor, connect your fingers around your big toes, or grasp your opposite hand around your elbow.

Although the thighs are also being stretched, this stretch is usually associated with the hamstrings. Additionally, your back should feel slightly relaxed.

Try bending your knees further or placing your hands on a box or yoga block if you are unable to touch the floor.

Heel Drop on One Leg

As you stand, place the heels of your feet on the edge of the step.

Let one heel fall to the ground. Don’t put the weight on the other leg when bending it.

Repeat on the opposite side. Either fall both heels to the floor and elevate them up and down or gently move your heels back and forth to make this a dynamic stretch.

This stretch can be done on the edge of a treadmill, a step, or a solid box.

Dorsiflexion Stretch

Sit on the ground. Legs extended in front.

Tightly wrap the elastic band around a substantial piece of furniture, like a hefty table or chair, to protect it.

Put your foot around the band’s other end.

Pull the toes toward the body, and then gently bring them to their original position.

After ten repetitions of the motion, switch to the other side.

Lunging Calf Stretch

Place yourself a few feet from a wall. You can just perform this with your hands on your hips (as demonstrated above) if you’re not close to a wall.

Hold the wall with your hands for balance, then step backward into a little lunge, bending your front leg but maintaining a straight back.

The greater the stretch, the more you lean into the wall and press your back heel down until it is flat on the floor.

Repeat on the other side.

Calf Raise

Place your feet hip-width apart and stand on a level platform with your toes pointed directly forward

Plant your heels on the floor and lift your toes while tensing your calf muscles.

This represents one rep. Keep doing the reps.

Your calf range of motion is increased with this dynamic stretch.

Inchworm

Arms at your sides, hip-width apart, posture straight.

Put your hands on the ground and bend from the waist.

With your hands flat, wrists placed below your shoulders, and your core, quadriceps, and buttocks activated, walk your hands forward to achieve a high plank position.

Take a single, high-plank pause.

Walking your hands back to your feet and standing will return you to the starting position.

Just one representative is shown here. From your shoulders to your heels, this dynamic stretch activates every part of your body.

When you walk your hands back to the beginning position, your calf also joins.

Downward Dog

Start by putting both hands directly below your shoulders in a high plank position.

Using your palms and fingers, press your buttocks up towards the ceiling and transfer your weight back, forming an inverted V with your body.

Breathe while maintaining this posture

Pressing your heels through the floor is the secret to a powerful calf stretch from this traditional yoga pose.

Keep your heels down and bend your knees slightly to work on the lower portion of these muscles.

Stretching your glutes, lower back, and hamstrings will also benefit from this exercise.

Downward Dog with Foot Pedal

Start in a high plank position, immediately placing your hands under your shoulders.

Make an inverted V shape with your body by pressing your fingers and hands together and shifting your weight back to bring your buttocks to the ceiling.

Step up on one foot’s toes and plant the heel of the other foot firmly on the ground.

Repeat the pushing motion in reverse on the opposite side. Keep on pushing.

This deep downward dog stretch is mostly for your calves, heels, and hamstrings.

Bent-over calf Stretch while standing

Place your feet a little apart.

Fold forward, holding your front foot beneath your toes, bending your back knee while keeping your front knee straight.

Pull your toes up and feel the stretch in your calf.

Repeat on the opposite side.

Half-Split Stretch

Start kneeling position with your right knee in your right hip while your left leg fully extended in front of you.

The left foot should be flexed. When you feel a stretch in the back of your left thigh, move your hands beside your left leg.

Cross your arms over your left leg. Bend your left knee slightly if you experience a pull behind it.

You can also feel your calf being stretched by bending your knee. After a set period of time, hold this stance and then repeat it on the right side.

Plantarflexion stretch

Stretching your legs out, take a seat on the floor.

Wrap one foot around one end of the flexible band, then grab the other end.

After slowly bringing the toes back to the beginning position, gently point them forward.

Repeat this motion ten times, then move to the other side.

Advice: Ensure that the resistance from the elastic band is comfortable for the movements.

If not, step away from the furniture and apply more force to the band.

Calf Stretch On A Stepper

Place your heel against the back of the step while standing on it to stretch your leg.

My favorite calf stretch is this one. Feel the stretch in your calf as you lower the heel by bending the other knee upward.

Hold for thirty seconds, then repeat three times.

Stretching the gastrocnemius requires keeping the knee straight.

When performing calf stretches, bend the back knee slightly to target the soleus.

holds for thirty seconds before repeating three times.

You may discover that if you perform the exercises on the stairs, you get a better stretch if you place your other foot on a higher step.

Common mistakes to avoid during calf stretches

Here are mistakes to avoid when stretching your calf:

Go back to the ground right away: For maximum effect, the legs should be positioned slowly and gradually.

Allowing pressure on the arms: There are many calf muscle stretches available, however,, applying pressure from the arms will not aid the upper body and will instead cause unnecessary strain.

Stretching your calf muscles before getting out of bed can help you relax up and prevent you from standing on the foot that hurts when you perform this stretch in the morning to treat plantar fasciitis. For many reasons, stretching should come first, even after walking and other exercises to warm up the calf muscles.

safety and precautionary measures for calf muscle exercise?

Before starting any fitness program, see a physician or physical therapist if you have a history of injury or chronic pain in your hips, back, or legs.

Do not stretch following an injury until you are able to press your toes on the ground without experiencing pain.

You will experience muscle strain when stretching, but not pain. You should stop the stretching exercise if you start to feel pain.

Do not stretch following an injury until you are able to press your toes on the ground without feeling pain.

Do not perform if you have ankle or foot problems.