Wednesday 30 May 2018

McKenzie Method : Low Back Extension Exercise

 McKenzie Method INTODUCTION :

Many people spend long periods of time in a seated position. Being seated promotes a flexed spinal posture which, according to back expert and author Stuart McGill, can cause intervertebral discs to bulge outwards resulting in pain and inhibited spinal extension. McKenzie’s exercise series is designed to encourage the displaced disc to move back into its correct position which will alleviate the pain and allow freer spinal movement.

The McKenzie method is a classification system and a classification-based treatment for patients with low back pain. A acronym for the McKenzie method is mechanical diagnosis and therapy (MTD). The McKenzie method was developed in 1981 by Robin McKenzie, a physical therapist from New Zealand.

The aims of the therapy are: reducing pain, centralization of symptoms (symptoms migrating into the middle line of the body) and the complete recovery of pain. The prevention step consists of educating and encouraging the patient to exercise regularly and self-care.

CLASSIFICATION :

Posture syndrome :
Refers to pain which occurs due to a mechanical deformation of normal soft tissue from prolonged end range loading of periarticular structures.

Dysfunction syndrome :

Refers to pain which is a result of mechanical deformation of structurally impaired tissues like scar tissue or adhered or adaptively shortened tissue.

Derangement syndrome :

Refers to pain which is caused by a disturbance in the normal resting position of the affected joint surfaces.

This syndrome is classified in two groups :

Irreducible derangement
The criteria for derangement are present.
No strategy is capable to produce a permanent change in symptoms.
Reducible derangement
Shows one direction of repeated movement which decreases or centralizes referred symptoms / preferred direction.

Other or non-mechanical syndrome
  • Spinal Canal stenosis
  • Hip disorders
  • Sacroiliac disorders
  • Low back pain in pregnancy
  • Spondylolysis and spondylolisthesis
SIGNIFICANCE :

McKenzie’s exercises are designed to reposition any displaced intervertebral discs. This is initially done by using gravity to draw the discs back into the spine and then actively to consolidate the effect of gravity. 

To facilitate disc movement, you must relax as much as possible when performing the exercises and maintain relaxed and even breathing for the duration of the exercise. McKenzie’s exercises can be categorized as either passive or active and the passive exercises should always be performed first.

STAGES OF EXERCISE :

1. Lying Prone Back Exercise :
The patient takes place at the treatment table in prone position. The arms have to be parallel with the thorax, with the hands next to the pelvis. The head is turned to one side. This position creates automatically a lordosis of the lumbar spine. Although this position may be painful, the pain does not indicate the procedure is undesirable if it is felt centrally.
Patients with posterior derangement should be careful when arising from the position to standing. It is important that, while arising, the restored lordosis is maintained.
In any kind of derangement it is important to perform the exercise long enough (5-10 minutes) for the fluid to alter its position anteriorly.
For example patients with lumbar kyfosis, it is possible that the patients cannot tolerate the prone position unless they are lying over a few pillows.
    Low Back Prone Lying exercise
prone lying Back Exercise

2. Extension in Prone Lying :

The patient lies on his abdomen while the hands are placed near the shoulders. The hands are placed with the palms down. Now the patient makes a press-up movement with straight arms. The Pelvis stays near the table while the patient presses the thorax upwards. After this movement the patient returns to his starting position and repeats this exercise 10 times.
The aim of this exercise is to make the lumbar spine relax after the maximum extension, in the relaxation phase.
It is possible that there occurs central low back pain described as a strain pain, but it will gradually wear off.
This procedure is the most important and effective in the treatment of derangement as well as extension dysfunction.

Extension in Prone Lying exercise
extension on elbow


 extention on hand

       extention on hand


3. Standing Lumbar Extension :

The patient stands up straight with his feet apart, to remain a stable position. The hands are placed on the lumbar region, in the area of the spina iliaca posterior superior. His hands fixate the pelvis while the patient leans backwards. The patient has to lean backwards as far as possible.
It is used mainly in preventing future back problems once your acute pain has resolved. It can also be used as an alternative to prone press ups if social situations don't allow you to lie flat on the floor and exercise, but you need to extend your spine to manage your back pain.
extension in standing


4. The Flexion Rotation Exercise for Low Back Pain :

To do the exercise, lie on your side (typically on the side with the most pain), and bend your knees. Straighten your bottom leg, and tuck your top foot behind your bottom knee. Slowly reach your upper hand to your shoulder blade, and rotate your spine by moving your top shoulder back and towards the floor. Repeat the exercise for 10 repetitions.
If you have tried the press up with hips off center and the standing side glide exercise and are still having symptoms, you may want to move on to the flexion rotation stretch for low back pain. This stretch can be done to treat back pain on one side or pain that is traveling down your leg.

Self-treatment exercises :

Rest position for cold pack
Sphinx-movement
standing back extension
Pelvic side shift
This exercise is called a “mirror exercise” and can be helpful when you have a “blocked” back and you’re leaning to one side because of it. The patient has to lean with his upper body against the wall, while his feet take same distance from the wall. Now the patient has to move his pelvis against the wall and back to the beginning position. This exercise has to be repeated 8-10 times.

McKenzie Method Exercise
Other Related Article :

williams flexion exercises


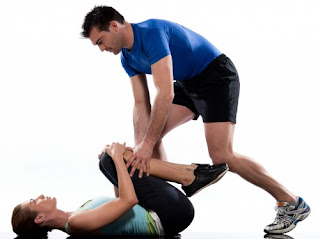
Proprioceptive Neuromuscular Facilitation (PNF) Technique :

INTRODUCTION OF PNF Technique :

      
Proprioceptive Neuromuscular Facilitation (PNF)  Technique
PNF Training 

Flexibility is key for athletes and nonathletes alike. It allows you to move freely and comfortably in your daily life, and can also help prevent injury during exercise. One of the best ways to increase your flexibility is by stretching. However, research suggests that not all stretching techniques are created equal. Proprioceptive neuromuscular facilitation (PNF) stretching relies on reflexes to produce deeper stretches that increase flexibility.

Proprioceptive Neuromuscular Facilitation (PNF) is a more advanced form of flexibility training that involves both the stretching and contraction of the muscle group being targeted.

According to the International PNF Association, PNF stretching was developed by Dr. Herman Kabat in the 1940s as a means to treat neuromuscular conditions including polio and multiple sclerosis.

PNF stretching was originally developed as a form of rehabilitation, and to that effect it is very effective. It is also excellent for targeting specific muscle groups, and as well as increasing flexibility, it also improves muscular strength.


PRECAUTION

Certain precautions need to be taken when performing PNF stretches as they can put added stress on the targeted muscle group, which can increase the risk of soft tissue injury. To help reduce this risk, it is important to include a conditioning phase before a maximum, or intense effort is used.

Also, before undertaking any form of stretching it is vitally important that a thorough warm up be completed. Warming up prior to stretching does a number of beneficial things, but primarily its purpose is to prepare the body and mind for more strenuous activity. One of the ways it achieves this is by helping to increase the body’s core temperature while also increasing the body’s muscle temperature. This is essential to ensure the maximum benefit is gained from your stretching. Click here for a detailed explanation of how, why and when to perform your warm up.


EFFECT OF PNF

While there are multiple PNF stretching techniques, all of them rely on stretching a muscle to its limit. Doing this triggers the inverse myotatic reflex, a protective reflex that calms the muscle to prevent injury.
“PNF causes the brain to go ‘I don’t want that muscle to tear’ and sends a message to let the muscle relax a little more than it would normally,” says fasciologist Ashley Black.
PNF is a stretching technique utilized to increase ROM and flexibility. PNF increases ROM by increasing the length of the muscle and increasing neuromuscular efficiency.


PNF TECHNIQUES :

      
PNF Techniques Overview


Revarsal of Antagonists: A group of techniques that allow for agonist contraction followed by antagonist contraction without pause or relaxation.

  • Dynamic Reversals (Slow Reversals): Utilizes isotonic contractions of first agonists, then antagonists performed against resisitance . Contraction of stronger pattern is selected first with progression to weaker pattern. The limb is moved through full range of motion.
      Indications: Impaired strength and coordination between agonist and antagonist, limitations in             range of motion, fatigue.
  • Stabilizing Reversals: Utilizes alternating isotonic contractions of first agonists, then antagonists against resistance, allowing only very limited range of motion.
       Indications: Impaired strength, stability and balance, coordination.

Rhythmic Stabilization (RS): Utilizes alternating isometric contractions of first agonists, then antagonists against resistance; no motion is allowed .
Indications Impaired strength and coordination, limitations in ROM; impaired stabilization control and balance.

Repeated Contractions, RC (Repeated stretch): Repeated isotonic contractions from the lengthened range, induced by quick stretches and enhanced by resistance; performed through the range or part of range at a point of weakness. Technique is repeated (i.e.,three or four stretches) during one pattern or until contraction weakens.
Indications Impaired strength, initiation of movement, fatigue and limitation in active ROM.

Rhythmic Initiation (RI): Voluntary relaxation followed by passive movements progressing to active assisted and active resisted movements to finally active movements. Verbal commands are used to set the speed and rhythem of the movements. Light tracking is used during the resistive phase to facilitate movement.
Indications Inability to relax, hypertonicity (spasticity, rigidity); difficulty initiating movement; motor planning deficits (apraxia or dyspraxia); motor learning deficits; communication deficits (aphasia).

Hold-relax

One PNF technique that Black says can trigger the reflex is commonly called “hold-relax.” This involves:

Putting a muscle in a stretched position and holding for a few seconds.
Contracting the muscle without moving (also called isometric), such as pushing gently against the stretch without actually moving. This is when the reflex is triggered and there is a “6- to 10-second window of opportunity for a beyond ‘normal’ stretch,” Black says.
Relaxing the stretch, and then stretching again while exhaling. This second stretch should be deeper than the first.

Contract-relax

Another common PNF technique is the contract-relax stretch. It is almost identical to hold-relax, except that instead of contracting the muscle without moving, the muscle is contracted while moving. This is sometimes called isotonic stretching.

For example, in a hamstring stretch, this could mean a trainer provides resistance as an athlete contracts the muscle and pushes the leg down to the floor.

Hold-relax-contract

A third technique, hold-relax-contract, is similar to hold-relax, except that after pushing against the stretch, instead of relaxing into a passive stretch, the athlete actively pushes into the stretch.

For example, in a hamstring stretch, this could mean engaging the muscles to raise the leg further, as the trainer pushes in the same direction.

Regardless of technique, PNF stretching can be used on most muscles in the body, according to Black. Stretches can also be modified so you can do them alone or with a partner.

Rhythmic Rotation 

Relaxation is achieved with slow, repeated rotation of a limb at a point where limitation is noticed. As muscles relax the limb is slowly and gently moved into the range. As a new tension is felt, RRo is repeated. The patient can use active movements (voluntary efforts) for RRo or the therapist can perform RRo passively. Voluntary relaxation when possible is important.
Indications Relaxation of excess tension in the muscles (hypertonia) combined with PROM of the range-limiting muscles.

To that end, PNF Techniques have broad applications in treating people with neurologic and musculoskeletal conditions, most frequently in rehabilitating the knee, shoulder, hip and ankle.

PNF PATTERN


  • The PNF exercise patterns involve three components: flexion-extension, abduction-adduction, and internal-external rotation.
  • The patterns mimic a diagonal rotation of the upper extremity, lower extremity, upper trunk, and neck.
  • The pattern activates muscle groups in the lengthened or stretched positions.
  • The upper and lower extremities each have two patterns: D1 and D2 motions targeting flexion and extension.
  • The patterns are used to improve range of motion at the joint as well as introduce resistance training. This will help improve the patients strength.


Upper Extremity 
D1 Flexion 


Starting Position
Shoulder extended, abducted, and internally rotated
Forearm pronated
Wrist ulnarly deviated
Fingers extended

Hand Position
Hand placed in patient's palm so that patient can grip and flex wrist to radial side
hand on the Anterior-medial surface of the patient's arm just above elbow

Movements to End Position
Shoulder flexed, adducted, and externally rotated
Forearm supinated
Wrist radially deviated
Fingers flexed

D1 Extension 


Starting Position
Shoulder flexed, adducted, and externally rotated
Forearm supinated
Wrist radially deviated
Fingers flexed

Hand Position
Hand over dorsal-ulnar aspect of the patient's hand
hand on he posterior-lateral surface of patient's arm just above elbow

Movement to Ending Position
Shoulder extended, abducted, and internally rotated
Forearm pronated
Wrist ulnarly deviated
Fingers extened

D2 Flexion 

Starting Position
Shoulder extended, adducted, and internally rotated
Forearm pronated
Wrist ulnarly deviated
Fingers flexed

Hand Position
Hand over dorsal-ulnar aspect of the patient's hand
Hand on anterior-lateral surface of the patient's arm just above elbow

Movements to End Position
Shoulder flexed, abducted, and externally rotated
Forearm supinated
Wrist radially deviated
Fingers extended

D2 Extension 

Starting Position
Shoulder flexed, abducted, and externally rotated
Forearm supinated
Wrist radially deviated
Fingers extended

Hand Position
Hand placed in the patient's palm so that the patient can grip and flex wrist to the ulnar side
Hand on posterior-medial surface of the patient's arm just above elbow

Moving to Ending Position
Shoulder extended, adducted, and internally rotated
Forearm pronated
Wrist ulnarly deviated
Fingers flexed

Lower Extremity 
D1 Flexion 


Starting Position
Hip extended, abducted, and internally rotated
Ankle plantarflexed
Foot everted
Toes flexed

Hand Position
Hand on distal anterior-medial aspect of thigh
Hand on medial aspect of dorsal surface of foot

Movements to Ending Position
Hip flexed, adducted, and externally rotated
Ankle dorsiflexed
Foot inverted
Toes extended

D1 Extension


Starting Position
Hip flexed, adducted, and externally rotated
Ankle dorsiflexed
Foot inverted
Toes extended

Hand Position
Hand on distal posterior-lateral thigh
Hand on lateral aspect of plantar surface of the foot

Movements to Ending Position
Hip extended, abducted, and internally rotated
Ankle plantarflexed
Foot everted
Toes flexed

D2 Flexion 

Starting Position
Hip extended, adducted, and externally rotated
Ankle plantarflexed
Foot inverted
Toes flexed

Hand Position
Hand on distal anterior-lateral thigh
Hand on lateral aspect of dorsal surface of the foot

Movements to Ending Position
Hip flexed, abducted, and internally rotated
Ankle dorsiflexed
Foot everted
Toes Extended

D2 Extension


Starting Position
Hip flexed, abducted, and internally rotated
Ankle dorsiflexed
Foot everted
Toes Entended

Hand Position
Hand on distal posterior-medial thigh (wrapped around posterior aspect of femur)
Hand on medial aspect of plantar surface of the ball of the foot

Movements to Ending Position :
Hip extended, adducted, and externally rotated
Ankle Plantarflexed
Foot inverted
Toes flexed


Other Physiotherapy Technique Related Article :
               
Rood Approach Details